Exposing a photograph and how it’s done.
Its been a few months since I posted a blog so here it goes 🙂
I can nearly feel the rust fall off as I write this, speaking of rust you should have seen the sea salt I cleaned off my tripod after this photo shoot.
An hours worth of cleaning and disassembly was on the cards the following day. Incidentally, that’s one of my top tips for seascapes, I think you really have to immerse yourself in the environment to give the viewer the visual impact of actually being there. To stand back from the water and capture your image on dry land can also work but for me, the movement and feel of the water can also get lost unless you capture that close up feel where the water is at its best.
I provide a complete range of photography workshop and one to one tuition sessions where I share and demonstrate a lot of these tips, for more details of my photography workshops in Ireland please click here.
Anyway, as usual, I am going off the point. These photographs were captured in late 2016 and the reason why I picked these specific photographs is because of the contrasting styles I took from nearly the same spot that evening. While there may have been three minutes between the exposures the only real difference in conditions is the tides positioning on the shore.
Location
Sheep’s Cove, South Ring, West Cork a beautiful little place I have been going to for the last 20 years and it still amazes me every day I go there. With jagged rock formations and beautiful little details around every little corner, it has so many possibilities. You have a soft sandy beach on one side and on the other side a sheltered pebble beach, although this beach can’t be reached at high. There is a gorgeous beach/coast walk from there over to the headland by the “Green Bar” with a beautiful panoramic view over to Inchydoney and Dunmore. Although this walk isn’t very long it sure is stunning, Just be careful to only go on this walk when the tide is out as an oncoming tide at the wrong time could trap you on the beach until low tide returns.

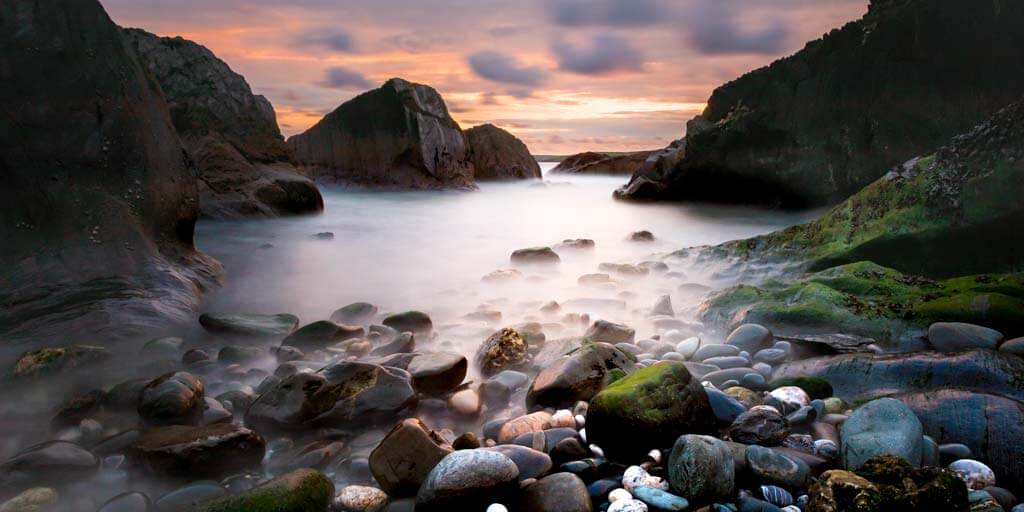
Photograph 1
The image above was achieved via a 30 second exposure with a combination of Formatt Hitech Firecrest Filters, a 10 stop nd filter and a 1,5 nd grad (5 stops) and at F9 on a Nikkor 16-35mm F4 Lens set to 16mm, my trusty Manfrotto tripod with ball head a pair of wellies (VIP). The more important aspects to capturing this image would be the filters and the tripod, without the filters we could never achieve the balancing of light from highlights to shadows and the tripod is vital because as I was in the water with waves coming and going the heavy solid tripod kept the camera stable to prevent any unwanted motion blur. Yes the Nikon D810 has 36mp of sheer quality builtin with some amazing dynamic range and the Nikkor 16-35MM F4 is very sharp and all that helps but I have achieved similar results with budget cameras and cheaper Lenses, in saying that if you have the money to spend I would highly recommend the combo. I choose F9 as the aperture to keep the image as sharp as possible while still maintaining some nice depth to the photograph. Incidentally, there is a belief that F16 and upwards brings greater overall sharpness to an image but due to lens diffraction this is not the case. I usually find most lenses perform best between F9 to F11 in saying that I also use F16 for added depth of field sometimes in landscapes. Possibly the more important element for correct depth of field is your focus point and where in your image you focus. Live view is incredibly handy to confirm the correct depth of field when zoomed in at 100% you can see the areas in focus and out of focus.
Composition
To get the water to have a bit more impact in images I generally try to go as low as possible with my tripod, with the Manfrotto pro3 055 that’s very easy as the legs have numerous different locking angles and as they are all independent of each other so rocky or uneven ground is not a problem. Also, a ball head on the tripod means quick levelling movements can be very easily made. Lowering the camera brings the water into play a bit more as it brings it more into the viewers level. The Natural framing of the rocks and how they guide you back towards the sky also helps to soak someone into the photograph. The last detail is the sunset, yes I had no control over that but being in the right place at the right time is what photography is all about, oh and a bit of luck too
I read an article years ago and when a photographer was interviewed he said “a good image grabs you initially and then it serenades you with its details until it captivates your mind and finally you are actually there” that’s something I think of every now and then and wish to achieve one day.

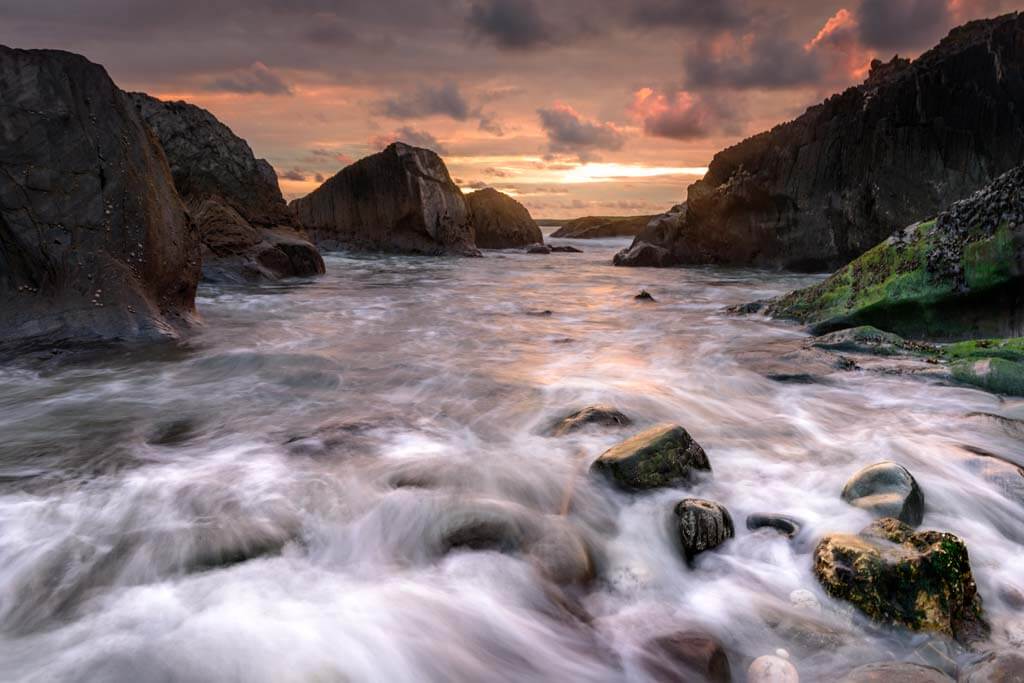
Photograph 2
The second photo is far simpler and was taken with Formatt Hitech Firecrest Filters, a 6 stop nd Filter and the 1.5 nd grad again at F9 at 24mm and although it was taken only 3 minutes later and at a different focal length it looks quite different due to the shutter speed. The aim for this image was to show or highlight the motion of the water over the foreground which again was emphasized by the lower camera angle. There is always a certain element of luck in getting the flow right but shutter speed is always critical. Too slow and you lose detail in the water flow and too fast kills any form of movement in the wave. I haven’t put a shutter speed in as it depends on the speed of water and even distance of the water to the camera. The clouds are more distinct and sharper in this image due to the shorter shutter speed and the longer focal length helps to bring the sky closer to the viewer and help to shorten the depth back to the horizon while still maintaining sharp focus due to the F9 Aperture.
There are obviously lots of other settings and ideas that run through your head before you take a photograph, just taking a photo and hoping for the best in my mind is one of the worst things you can ever do as a photographer. If you never understand how an image is developed how could you ever hope to consistently capture a good one? Stop for a second and in your mind picture your desired outcome now go capture it. With a lot of practice and careful thought, you can consistently achieve the images you want without resorting to HDR or over edited digital images which are nearly everywhere now. Think and you will learn, just take a photo and hope and you will never develop.
Focus is something I haven’t even touched on in this short blog but its something I will come back to at a later date probably.
Safety
The most important rule I have when photographing the ocean is to never ever turn your back on it, always expect the unexpected and never leave your gear on the ground. Always place it on the rocks away from the tide in your line of vision and well above the reach of waves. Alternatively, carry it on your back but if you slip on wet rocks you run the risk of crushing it or immersing it in water. Above all care about you, a new camera can always be bought… So stay safe, watch the tide and keep an eye out for rogue waves.
Not the best of photographs but they were taken minutes apart and I think it clearly shows how a bit of control can completely change an image.
What do you think?
For more Landscape photography tips please see my new Landscape photography website here…
See you out there,
Kieran.
