Nikon Zf Best Settings: The 15 I Changed Straight Away
You can watch the full video below or read on if you prefer.
My Zf Settings at a Glance
| Setting | Menu | My choice |
|---|---|---|
| Image quality | Photo shooting | RAW, lossless compressed |
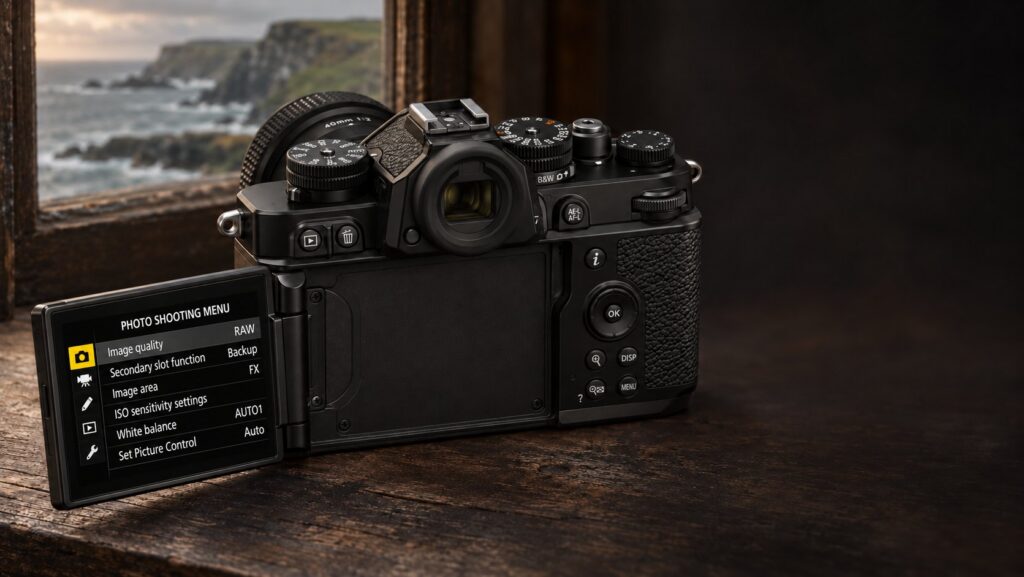
| Secondary slot function | Photo shooting | Backup |
| AF-C in-focus display | Custom (a10) | On |
| Store points by orientation | Custom (a5) | Focus point |
| Save focus position | Setup | On |
| AF activation | Custom (a6) | AF-ON only |
| AE-L/AF-L button | Custom (f2) | AF-ON |
| Focus point wrap-around | Custom (a9) | Wrap |
| Video record button (photo mode) | Custom (f2) | ISO sensitivity |
| Auto ISO maximum | Photo shooting | ISO 3200 to 6400 |
| Fn button | Custom (f2) | Focus mode/AF-area mode |
| Metering | Photo shooting | Spot |
| Standby timer | Custom (c3) | 5 minutes |
| Extended shutter speeds | Custom (d6) | On |
| Lens Fn button | Custom (f2) | Starlight view |
1. Shoot RAW
The first thing I changed was image quality, from JPEG to RAW. RAW gives you far more detail in your photographs and a huge amount of latitude when you edit them afterwards.
For RAW recording quality I choose lossless compressed. The difference in detail compared with high efficiency is practically nothing, but lossless compressed files are more widely supported by third-party editing software.
2. Set the Second Card to Backup
This is incredibly important if you shoot professionally, or simply for peace of mind. Setting the secondary slot to Backup writes every photograph to both the SD card and the micro SD card, so a card failure doesn’t cost you your images.
If you are worried the micro SD card will slow the camera down, don’t be. With a SanDisk Extreme Pro micro SD card fitted, the camera showed 43 shots left in the buffer. I held the shutter down until it filled and it took about 20 seconds to finish writing everything to both cards. If you need to sit on the shutter button for longer than that, you probably need a Z8 or Z9 rather than a Zf.
Getting the micro SD card out of the Zf is a bit of a pain, especially with a grip fitted. My trick is to never take it out. When I get home, I back up the full-size SD card to my computer, my NAS drive and the cloud. Then I simply format the micro SD card in the camera.
Nikon Z camera guide apps
My camera guide apps put my recommended settings and menu paths in your pocket. The Z8 app is out now, with more cameras on the way and a Zf app planned for early 2027. You can see the full release schedule and join the waitlist on the apps page.
See the Nikon Z camera guide apps3. Turn On AF-C Focus Confirmation
This is a setting you will love if you shoot in AF-C. By default, the focus box stays red in AF-C even when focus is locked, so you get no visible confirmation. In AF-S it turns green, but not in AF-C.
Turn on the AF-C in-focus display and the box turns green when focus is locked, giving you that confirmation on screen.
If your focus box still isn’t turning green, or you want the menu path for another Nikon Z camera, see my guide to fixing the Nikon AF-C focus box.
4. Store Focus Points by Orientation
Store points by orientation gives you two separate focus points, one for landscape and one for portrait. Set your focus point in landscape, then turn the camera to portrait and move the point to where you want it. The camera remembers both. Every time you switch orientation, it goes straight back to the right point for that orientation. You can store the AF-area mode by orientation too if you want.
5. Save Focus Position
If you shoot landscapes or commercial work, this is a nice one to have on. By default, if you focus on something and then switch the camera off and on again, the lens resets and your focus is gone. With Save focus position turned on, the camera remembers where you focused, so it won’t reset to infinity every time you switch it on.
6. Back Button Focus
Back button focus separates focusing from the shutter button. The shutter button only takes the picture and the AE-L/AF-L button on the back does the focusing. There are two parts to setting it up.
Now when you press the AE-L/AF-L button the lens focuses and the shutter button no longer does.
New to back button focus? My guide to setting up back button focus on Nikon Z cameras covers every Z body, including the Zf, which uses a different button.
7. Focus Point Wrap-Around
By default, the focus point stops at the edge of the frame, so moving it from one side to the other means going all the way back across. Turn on wrap-around and it jumps from the top to the bottom or from one side to the other. It is a lot quicker when you are moving the focus point around the frame.
8. Record Button for ISO
I set the red video record button on top of the camera to ISO, which works in photo mode only. In video mode it still starts recording as normal.
Press the button and the rear command dial changes the ISO, while the front dial turns Auto ISO on and off. I love this because after years with the ISO button on top of my Z8 and Z7II, it is pure muscle memory. One thing to watch: this only works with the ISO dial on top of the camera set to C. On any other number, the dial sets the ISO.
9. Set a Maximum Auto ISO
Auto ISO is incredibly handy, but without a limit the ISO can climb a long way and you may not be happy with the noise. On the Zf I am very happy up to ISO 3200. ISO 6400 is also quite good, but you do notice a good bit more noise. Above that, it obviously gets noisier.
Everyone’s tolerance for noise is different, so try it and see what you are happy with. I am very picky when it comes to noise and so are my clients. You can always override Auto ISO manually when you need to.
10. Front Fn Button for Focus Mode
Out of the box, the front Fn button is set to white balance. I change it to focus mode, again for muscle memory from my Z7II and Z8. Hold the button and turn the rear dial to switch between manual focus, AF-S and AF-C. Turn the front dial to change the AF-area mode. You can set it to something else if you prefer.
11. Metering Mode
Set the metering mode to whatever suits the way you shoot. I use spot focus and spot metering the vast majority of the time, so mine is set to spot. The options are matrix, centre-weighted, spot and highlight-weighted metering.
12. Longer Standby Timer
The default standby timer of 30 seconds is too short for me. The camera keeps falling asleep and you have to press a button to wake it up. I set it to 5 minutes, as the Zf’s battery life is good enough to cope and it suits the way I work.
13. Extended Shutter Speeds
By default, the slowest shutter speed is 30 seconds and after that it goes to Bulb. Turn on extended shutter speeds and, in manual mode, you can set exposures of up to 15 minutes. Turn the shutter speed dial to 1/3 STEP and use the command dial to go past 30 seconds: 60 seconds, 90, 120, 180, 240 and beyond.
This is brilliant for long exposure work. Set a 2 or 4 minute exposure in camera, press the shutter and walk away, with no need for a separate timer or remote. I have used this on my Z7II and Z8 for years and it is one of my favourite hidden settings.
14. Customise the i Menu
The i menu gives you quick access to the settings you use most, without going into the main menus. It might seem straightforward, but setting it up around how you shoot saves a lot of time. Press the i button and they are all right there.
15. Lens Fn Button for Starlight View
I set the lens Fn button to switch Starlight view on and off. Many Z mount S-line lenses have this button, including the Z 24-70mm f/2.8 S I used here.
Starlight view brightens the display in very dark scenes so you can see clearly and compose properly. I use it when shooting with flash in poorly lit places. The camera can still focus without it, but I can’t see the scene to compose. Press the lens Fn button and everything becomes visible. The only drawback is you can’t judge the exposure on screen, but with flash you can’t anyway.
The Gear I Mention
The micro SD card I used for the buffer test is the SanDisk Extreme Pro, which works well and is very good value. If you want more grip on the Zf, Neewer and SmallRig both make grips and cages for it and I cover the grip I used in my Nikon Zf accessories guide. Neewer gear is cheaper with my discount code, which you will find on my Neewer discount code page.
Nikon Zf on AmazonNikon Zf at B&HNikon Zf at AdoramaSanDisk Extreme Pro micro SD
Neewer Zf GripNeewer Zf Half CageSmallRig Zf GripSmallRig Zf Cage
These are affiliate links, so if you buy through them I may earn a small commission at no extra cost to you. Thank you for supporting my website and channel. You can also check current prices on my Nikon deals page.
Nikon Zf Settings FAQ
Does the micro SD card slow down the Nikon Zf?
Not in normal shooting. In my test, a full buffer of 43 shots took about 20 seconds to write to both cards with a SanDisk Extreme Pro micro SD card in the backup slot.
How do I set up back button focus on the Nikon Zf?
Set a6 AF activation to AF-ON only, then in f2 Custom controls assign the AE-L/AF-L button to AF-ON.
Why doesn’t the focus box turn green in AF-C on the Zf?
It is switched off by default. Turn on a10 Focus point display > AF-C in-focus display and the box will turn green when focus is locked.
What is the longest shutter speed on the Nikon Zf?
With d6 Extended shutter speeds turned on, you can set exposures of up to 15 minutes in manual mode without using Bulb.
I hope these settings help you get even more from your Zf. See you out there,
Kieran.
- 20 November 2026: First published.