Nikon Z8 Memory Banks: How I Set Them Up
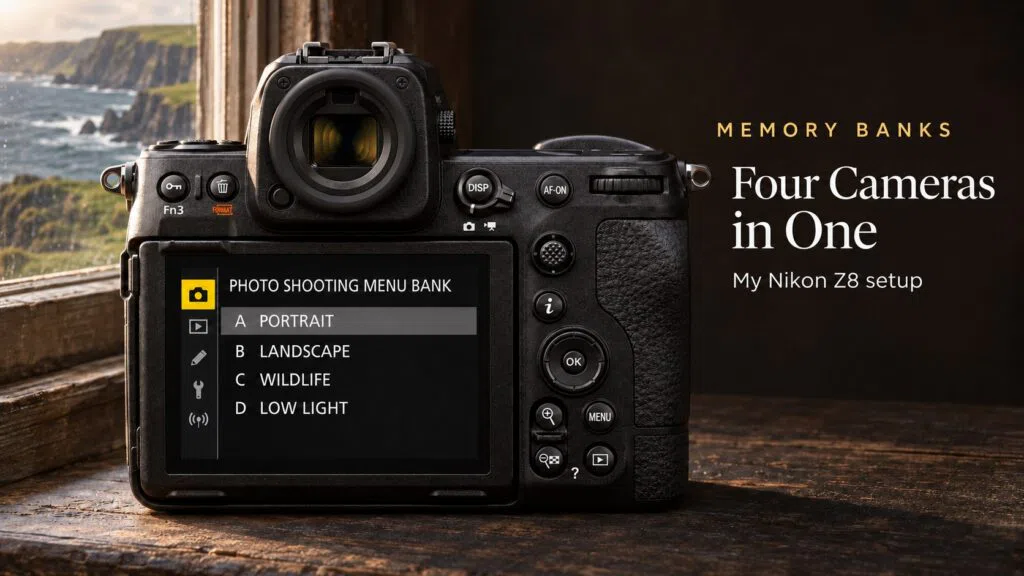
Update, November 2026: Since filming this video I’ve raised my Auto ISO limits, because the Z8 handles higher ISOs better than I gave it credit for. Bank A (Portrait) now tops out at ISO 3,200, Bank C (Wildlife) at 6,400, and Bank D (Low Light) stays at 12,800. Landscape is still manual at ISO 64. The bank structure is exactly the same, so the setup in the video still applies.
This is how I set up the memory banks on my Nikon Z8 and how you can set them up to suit the way you shoot. We all shoot differently, so what suits me may not suit you, but this should put you on the right path.
Plenty of you asked for this after my Nikon Z8 autofocus settings guide, where I explain the boosted subject detection setup I use. These banks are built around it, so it is worth reading that one too.
You can watch the full video below or read on if you prefer.
What Are Memory Banks?
Memory banks let you change the camera’s behaviour and a whole set of settings in a split second. Say you are shooting landscapes and spot a beautiful portrait moment with a friend out of the corner of your eye. One quick switch changes your focus settings, subject detection, aperture, ISO and ISO mode, shutter speed and more, so you are taking the shot instead of fumbling with settings.
The part I like most is that they are live settings, not set in stone. Change the shutter speed, aperture or ISO in bank A, switch to bank B and back and bank A is exactly where you left it. That keeps everything fluid and right for the current light.
One thing I never change between banks is my focus system or what the Fn buttons do. The aim is to keep everything consistent and simple, so muscle memory takes over and I can concentrate on the moment, not the camera.
My Four Banks at a Glance
| Bank A: Portraits | Bank B: Landscapes | Bank C: Wildlife | Bank D: Low light | |
|---|---|---|---|---|
| Mode | Manual | Manual | Manual | Manual |
| Focus | AF-C, wide-area L + subject detection | AF-S, single-point | AF-C, wide-area L + subject detection | AF-C, wide-area L + subject detection |
| ISO | Auto, max 3,200 (1,600 in the video) | Manual, ISO 64 | Auto, max 6,400 (1,600 in the video) | Auto, max 12,800 |
| Stabilisation | On, Sport | Off (tripod) | On, Sport | On, Sport |
| Second card | Backup | Backup | Overflow | Overflow |
| Default exposure | f/2.8, 1/1250 sec | f/11, 1/50 sec | As needed | As needed, Starlight view on |
Change the order to suit you. If you are mainly a wildlife photographer, make bank A your wildlife bank. You might only need two banks and if that works for you, that is perfect.
Set Up a Button to Switch Banks
First, set up a button so you can switch banks quickly. I use Fn3, because my two front Fn buttons are used for my autofocus setup. Press Fn3 and turn the rear dial to change banks.
If you want exposure mode, shutter speed and aperture stored per bank as well, turn on Extended menu banks in the Photo shooting menu.
Bank A: Portraits
Settings you change while in a bank are stored to that bank. As I am mainly a fashion and portrait photographer, bank A is for portraits.
- Manual exposure with my standard autofocus setup in AF-C: wide-area AF (L) with subject detection, as my subjects move.
- Auto ISO with a maximum of ISO 1600. That is as high as I normally like to go here. My little cheat is that I usually shoot manual ISO and flick to Auto ISO when I need it, knowing it will never go above 1600.
- Secondary card slot set to Backup, so every image is saved twice.
- Stabilisation on, set to Sport, which works really well for me.
- Default aperture f/2.8 and shutter speed 1/1250 sec, adjusted to the light on each shoot.
Store points by orientation and AF-C focus confirmation are also switched on, along with the other settings in my Nikon Z8 best settings guide, which stay the same in every bank. Note that my Fn1, Fn2 and Fn3 assignments have changed since that guide; the current ones are in my autofocus guide.
Copy and Rename Your Banks
Once bank A is set up, copy it to banks B, C and D and then tweak each one. It saves a lot of time. This is also where you can rename your banks.
Bank B: Landscapes and Still Subjects
- Manual exposure with single-point AF in AF-S, as nothing in the frame is moving.
- Stabilisation off, as I am usually on a tripod. Leaving it on during long exposures is a big no-no, as the stabilisation system can blur your images slightly.
- Manual ISO at base ISO 64.
- Secondary card slot set to Backup.
- Default shutter speed 1/50 sec and aperture f/11. Yes, every landscape photographer’s default. How cliché, I know.
I use this bank for products and property too.
Bank C: Wildlife and Sport
Bank C is for fast moving subjects in fairly good light.
- Manual exposure with my wide-area AF (L) subject detection setup in AF-C.
- Auto ISO with a maximum of ISO 1600, a very personal choice, so pick what suits you.
- Stabilisation on, set to Sport, which I toggle on and off as needed.
- Secondary card slot set to Overflow, so I am not held back by the slower SD card and the camera writes to the fast CFexpress card.
Bank D: Low Light and High Speed
Bank D complements bank C. It is for low light portraits and wildlife or high-speed sport where I need fast shutter speeds in lower light.
- Manual exposure with the same autofocus setup in AF-C.
- Auto ISO with a maximum of ISO 12,800.
- Stabilisation on, set to Sport.
- Secondary card slot set to Overflow.
- Starlight view on by default, with the lens Fn button set to switch it off and on.
Starlight view and the lens Fn button are Custom Settings, so they aren’t saved in the shooting bank. I have them set the same way in all my custom settings banks, so they’re always there whichever bank I’m in.
Back Up Your Settings
The most important step is to back up your settings to a memory card. The camera keeps everything in its own memory, but if the camera ever jams up on a job, you can reset it and reload your settings in a couple of minutes. That has never happened to me, but it is my worst nightmare on a shoot.
I save to an SD card, as they are cheap and keep a backup card in my camera bag at all times. To save to the SD card, either set Photo shooting menu > Primary slot selection to the SD card slot, or take the CFexpress card out first with the camera switched off. Both do the same job.
Never take memory cards in or out while the camera is switched on. In my eyes that is a criminal offence. Cards are not hot-swappable and it can corrupt the card or every file on it.
Formatting your cards regularly is good practice, but formatting wipes the saved settings. The fix is simple: make sure the camera settings are exactly how you want them, format the card, then save the settings back onto it again.
If you want every Z8 setting explained in one place, my Nikon Z8 Pro Guide app covers them all.
More on the Nikon Z8: Visit my Nikon Z8 hub for all my Z8 articles in one place.
Nikon Z8 Memory Banks FAQ
How many memory banks does the Nikon Z8 have?
Four photo shooting menu banks, A to D, which you can rename and copy between.
Do Z8 memory banks save shutter speed and aperture?
Yes, if you turn on Extended menu banks in the Photo shooting menu. The settings are live, so they stay where you last left them in each bank.
How do I switch memory banks quickly on the Z8?
Assign Photo shooting menu bank to a button, such as Fn3, in f2 Custom controls. Then hold the button and turn the rear dial.
How do I back up my Z8 settings?
Use Save/load menu settings in the Setup menu to save them to a memory card.
See you out there,
Kieran.
- 21 November 2026: First published.